How To Add a Contact Us Form Code and Create a Contact Us Page in Blogger
Option 1: Supporting by 123 Form Builder
Following this steps
1 – Go To 123 Form Builder and Create A Free Account
2 – Login To Your Dashboard
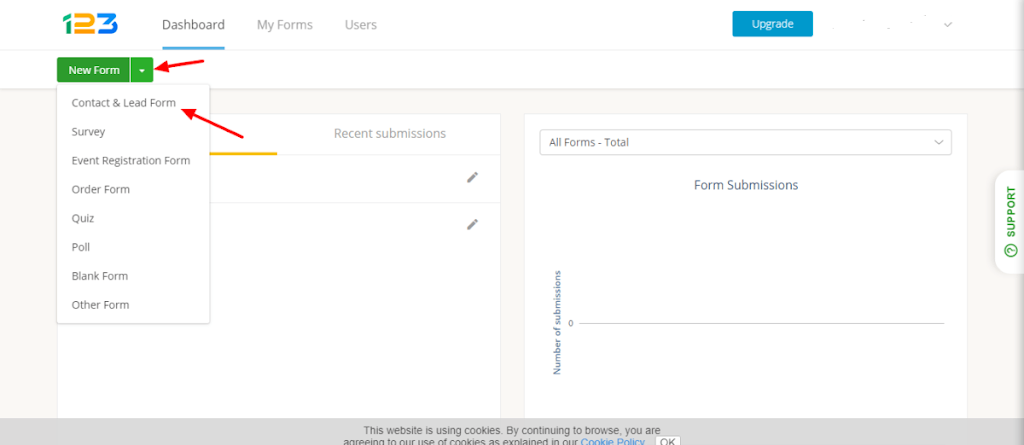
3 – Click On The Arrow Next To The Create A New Form Button.
4 – Click on contact form & Lead form option.

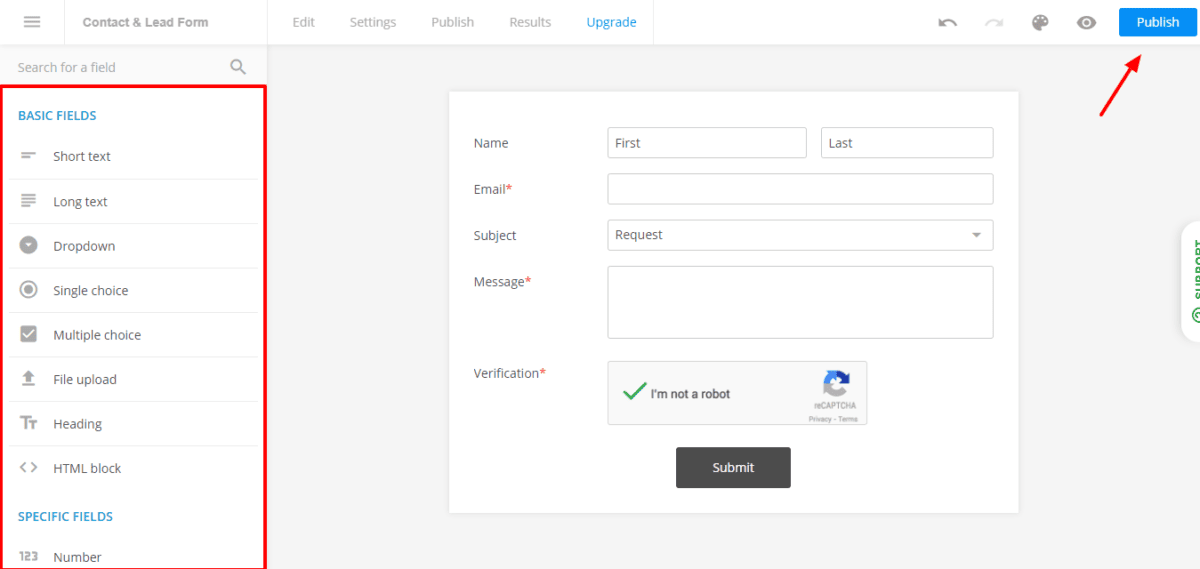
5 – Click on save and publish button.
6 – Copy the java script code from the screen. ( CTRL + C )

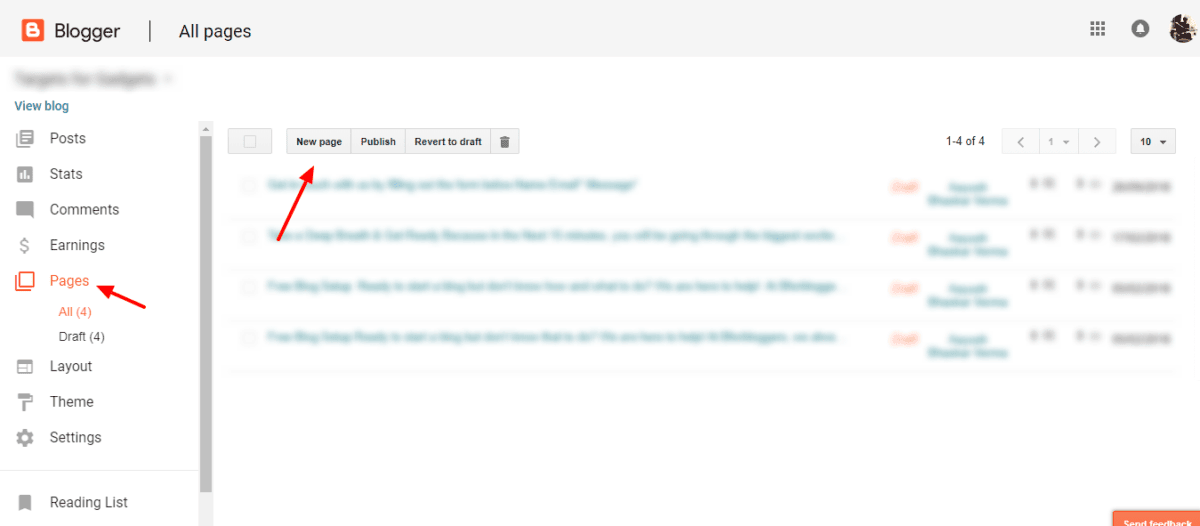
7 – Go to your Blogger blog dashboard and click on add new page. Name this page, “Contact Us.”
8 – Click on the HTML format editor button and paste the code here paste by ( CTRL + V ) and click publish.
Your contact form is now live on your blog.
Let’s move to our second method
Option 2: – Customizing the Blogger “Contact Us” Gadget
Following this steps
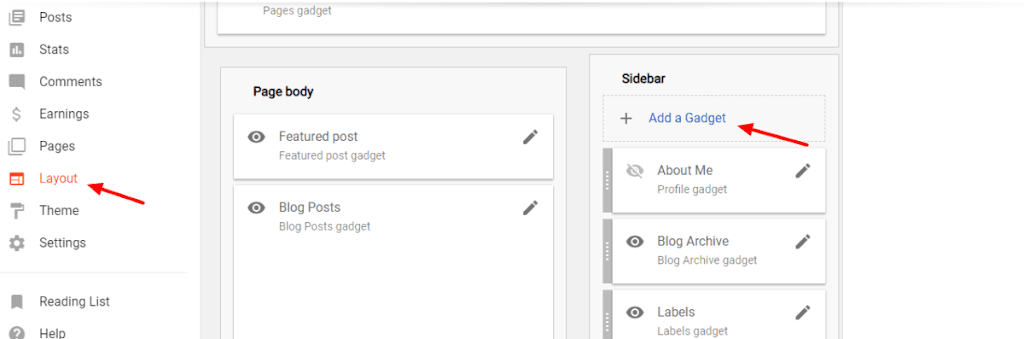
1 – Go to your Blogger dashboard
2 – click on the layout tab.
3 – Click on add new gadget.
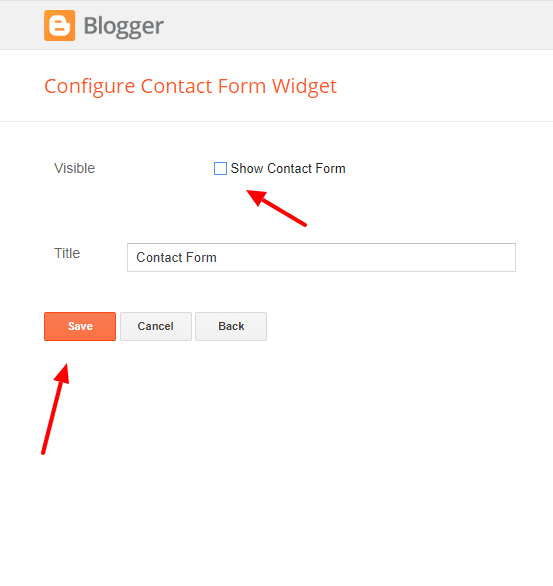
Step 4 – Select the contact us widget from the menu and
Step 5 – click on the add button. Uncheck the visible option and save the widget.
Step 6 – Add a new page to your blog. Name as this page, “Contact Us.” In the HTML editor copy and paste the following HTML contact form code:
<div id=”custom_ContactUsFromForBlogSpotBlogger” class=”widget ContactForm”>
<div class=”contact-form-widget”>
<p>Get in touch with us by filling out the form below.</p>
<div class=”form”>
<form name=”contact-form”>
<p></p>
Your Name
<br>
<input type=”text” value=”” size=”30″ name=”name” id=”ContactForm1_contact-form-name” class=”contact-form-name”>
<p></p>
Your Email
<span style=”font-weight: bolder;”>*</span>
<br>
<input type=”text” value=”” size=”30″ name=”email” id=”ContactForm1_contact-form-email” class=”contact-form-email”>
<p></p>
Your Message
<span style=”font-weight: bolder;”>*</span>
<br>
<textarea rows=”5″ name=”email-message” id=”ContactForm1_contact-form-email-message” cols=”25″ class=”contact-form-email-message”></textarea>
<p></p>
<input type=”button” value=”Send” id=”ContactForm1_contact-form-submit” class=”contact-form-button contact-form-button-submit”>
<p></p>
<div style=”text-align: center; max-width: 222px; width: 100%”>
<p id=”ContactForm1_contact-form-error-message” class=”contact-form-error-message”></p>
<p id=”ContactForm1_contact-form-success-message” class=”contact-form-success-message”></p>
</div>
</form>
</div>
</div>
<div class=”clear”></div>
<span class=”widget-item-control”>
<span class=”item-control blog-admin”>
<a title=”Edit” target=”configContactForm1″ onclick=”return _WidgetManager._PopupConfig(document.getElementById(“ContactForm1″));” href=”//www.blogger.com/rearrange?blogID=8799058979810298021&widgetType=ContactForm&widgetId=ContactForm1&action=editWidget§ionId=sidebar-right-1″ class=”quickedit”>
<img width=”18″ height=”18″ src=”// ( Change it your original Icon path )Your source code for icon image alt=””>
</a>
</span>
</span>
<div class=”clear”></div>
</div>
Important – Should be change the BlogID Highlighted in code of the above code with your blog’s original ID. You can find your BlogSpot blogID by going to your BlogSpot blog dashboard and looking at your URL in the browser’s’ address bar.


Comments (15)
Such an amazing blog with new updates. I love to learn more about this topic. Waiting for more like this.
PHP Training in Chennai
PHP Course in Chennai
PHP Training Institute in Chennai
PHP course
AngularJS Training in Chennai
React JS Training in Chennai
Web Designing course in Chennai
PHP Training in Velachery
PHP Training in Tambaram
PHP and MYSQL Interview Questions
Nice post Curtains Dubai
Thanks for sharing informative article with us…
QTP Training in Chennai
Qtp classes in chennai
qtp training institutes in chennai
qtp training in Thiruvanmiyur
QTP Training in OMR
LoadRunner Training in Chennai
Html5 Training in Chennai
clinical sas training in chennai
Spring Training in Chennai
Photoshop Classes in Chennai
Nice Blog…Thanks for sharing the article waiting for next update…
Artificial Intelligence Course in Chennai
AI Training in chennai
ai courses in chennai
Mobile Testing Training in Chennai
C C++ Training in Chennai
javascript training in chennai
Html5 Training in Chennai
QTP Training in Chennai
Spring Training in Chennai
DOT NET Training in Chennai
More impressive Blog!!! Its more useful for us…Thanks for sharing with us…
Hadoop Training in Chennai
Big data training in chennai
Big Data Course in Chennai
hadoop training
Hadoop training in porur
Big data training in OMR
Android Training in Chennai
IOS Training in Chennai
JAVA Training in Chennai
Selenium Training in Chennai
The blog which you have posted is more impressive… thanks for sharing with us…
Selenium Training in Chennai
best selenium training in chennai
selenium classes in chennai
best selenium training in chennai
Selenium Training in Tnagar
Selenium training in Thiruvanmiyur
Big data training in chennai
Software testing training in chennai
Android Training in Chennai
JAVA Training in Chennai
awesome article,the content has very informative ideas, waiting for the next update…
C C++ Training in Chennai
C++ Training
C Language Training
C C++ training in T nagar
C C++ training in Vadapalani
javascript training in chennai
core java training in chennai
Html5 Training in Chennai
DOT NET Training in Chennai
QTP Training in Chennai
I like this post and regularly I am reading your blog, so please updates more unique posts. Continue your great work.
nic epage
Ai & Artificial Intelligence Course in Chennai
PHP Training in Chennai
Ethical Hacking Course in Chennai Blue Prism Training in Chennai
UiPath Training in Chennai
Thanks for your nice post, i am interested to learn online freelancing, but firstly i have to learn computer , could you suggest me please which computer training center best.
Dot Net Training in Chennai | Dot Net Training in anna nagar | Dot Net Training in omr | Dot Net Training in porur | Dot Net Training in tambaram | Dot Net Training in velachery
The development of artificial intelligence (AI) has propelled more programming architects, information scientists, and different experts to investigate the plausibility of a vocation in machine learning. Notwithstanding, a few newcomers will in general spotlight a lot on hypothesis and insufficient on commonsense application. machine learning projects for final year In case you will succeed, you have to begin building machine learning projects in the near future.
Projects assist you with improving your applied ML skills rapidly while allowing you to investigate an intriguing point. Furthermore, you can include projects into your portfolio, making it simpler to get a vocation, discover cool profession openings, and Final Year Project Centers in Chennai even arrange a more significant compensation.
Data analytics is the study of dissecting crude data so as to make decisions about that data. Data analytics advances and procedures are generally utilized in business ventures to empower associations to settle on progressively Python Training in Chennai educated business choices. In the present worldwide commercial center, it isn't sufficient to assemble data and do the math; you should realize how to apply that data to genuine situations such that will affect conduct. In the program you will initially gain proficiency with the specialized skills, including R and Python dialects most usually utilized in data analytics programming and usage; Python Training in Chennai at that point center around the commonsense application, in view of genuine business issues in a scope of industry segments, for example, wellbeing, promoting and account.
valuable blog,Informative content…thanks for sharing, Waiting for the next update…
Study Abroad Consultants in Kerala
study abroad consultants in thrissur
Study Abroad Consultants in Calicut
abroad job consultancy in coimbatore
abroad job consultancy in calicut
abroad job recruitment agencies in calicut
study abroad
study in poland
study in europe
education in germany
instagram takipçi satın al – instagram takipçi satın al – tiktok takipçi satın al – instagram takipçi satın al – instagram beğeni satın al – instagram takipçi satın al – instagram takipçi satın al – instagram takipçi satın al – instagram takipçi satın al – binance güvenilir mi – binance güvenilir mi – binance güvenilir mi – binance güvenilir mi – instagram beğeni satın al – instagram beğeni satın al – polen filtresi – google haritalara yer ekleme – btcturk güvenilir mi – binance hesap açma – kuşadası kiralık villa – tiktok izlenme satın al – instagram takipçi satın al – sms onay – paribu sahibi – binance sahibi – btcturk sahibi – paribu ne zaman kuruldu – binance ne zaman kuruldu – btcturk ne zaman kuruldu – youtube izlenme satın al – torrent oyun – google haritalara yer ekleme – altyapısız internet – bedava internet – no deposit bonus forex – erkek spor ayakkabı – webturkey.net – minecraft premium hesap – karfiltre.com – tiktok jeton hilesi – tiktok beğeni satın al – microsoft word indir – misli indir
youtube abone satın al /n trendyol indirim kodu
cami avizesi
cami avizeleri
avize cami
no deposit bonus forex 2021
takipçi satın al
takipçi satın al
takipçi satın al
takipcialdim.com/tiktok-takipci-satin-al/
instagram beğeni satın al
instagram beğeni satın al
btcturk
tiktok izlenme satın al
sms onay
youtube izlenme satın al
no deposit bonus forex 2021
tiktok jeton hilesi
tiktok beğeni satın al
binance
takipçi satın al
uc satın al
sms onay
sms onay
tiktok takipçi satın al
tiktok beğeni satın al
twitter takipçi satın al
trend topic satın al
youtube abone satın al
instagram beğeni satın al
tiktok beğeni satın al
twitter takipçi satın al
trend topic satın al
youtube abone satın al
takipcialdim.com/instagram-begeni-satin-al/
perde modelleri
instagram takipçi satın al
instagram takipçi satın al
takipçi satın al
instagram takipçi satın al
betboo
marsbahis
sultanbet
dent hangi borsada
sc coin hangi borsada
btt coin hangi borsada
hnt coin hangi borsada
elf coin hangi borsada
psg coin hangi borsada
mdt coin hangi borsada
dot coin hangi borsada
mit coin hangi borsada
tiktok jeton hilesi
tiktok jeton hilesi
referans kimliği nedir
gate güvenilir mi
tiktok jeton hilesi
paribu
btcturk
bitcoin nasıl alınır
yurtdışı kargo